


Table of Contents:
- Why This Project is a Great Solution for Outdoor String Lights
- What Changed
- Project Begins: Outdoor String Lights – Backyard Makeover
- DIY Barrel Planters with Posts to Hang Outdoor String Lights
- Attach Your Outdoor String Lights to the Posts
- Choose Your Outdoor String Lights
- Backyard Finishing Touches
- Some Lessons Are Hard to Learn
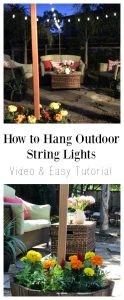
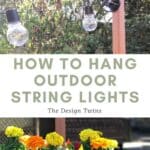
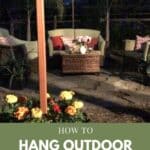
learn how to hang outdoor string lights Like a Pro!
I am a huge fan of outdoor string lights. They have the potential to totally transform any outdoor space. I am so excited to share with you how we made these outdoor string light planters. At first glance this post might seem like a regular DIY backyard makeover. Yes, you will learn how to create an amazing DIY outdoor string lights project. But you are in store for much more.
This really is more of a Cinderella story. Transforming my backyard turned out to be huge life lesson for me, and it proves once again that attitude is everything.
Why This Project is a Great Solution for Outdoor String Lights
Outdoor string lights are a fun & festive way to add ambiance and of course LIGHT to any outdoor space. The challenges of hanging lights outside are
1) where/how to hang them, and
2) how to get electricity to your lights.
- This project solves both problems beautifully. We had seen plenty of solutions and easy DIY projects, but we really wanted our solution to add beauty.
- Also, we had seen solutions using cement but not only were they not beautiful, they would be really heavy to move around our backyard.
- Finally, this solution uses solar outdoor string lights, completely solving the electricity challenge.

The Story of My Backyard Makeover
When we bought our home nine years ago the house had been completely remodeled and we felt like we were moving into our dream home. Everything was shiny and new and perfect. Everything, that is, except the backyard. The backyard had been left undone and was little more than a fenced in area with a few trees and a lot of dirt. We weren’t really upset by this. We had remodeled our last house and had planned and planted our own backyard, so we looked forward to being able to do the same to this space. Little did we know that my husband would lose his job six months later, and we would be dealing with financial struggles that would prevent that from happening.
Next, flash forward nine years. Our backyard is still dirt. We still haven’t had the finances to make any changes. Our boys play in the front yard when they want to kick their soccer ball around or play with the dogs. We have a beautiful home and are so grateful for the space we have but, we pretty much live inside year-round. This is significant especially since we live in California climate where outside living is possible 3/4 of the year.
Oh, the plans we had. Big plans. We wanted to create pathways, different patios, a deck and a covered pergola. We wanted to landscape with tropical plants and create a lush oasis including a fountain. In fact, they were such high hopes and such grand expectations that we became stuck. Without the finances for our grand project we became paralyzed to do anything. We couldn’t envision any compromise and were lost in self-pity.

What Changed
I spent nine years looking outside at the dirt and feeling sad. All I saw was what wasn’t there, I was looking at the situation with a “glass half empty” perspective instead of a “glass half full” one. That was all that needed to change.
I finally realized that I could apply the same determination and DIY ingenuity that I had on the interior of my home to my exterior spaces. The same can-do spirit, determination and creativity which had transformed the interior of my house could be used for our back yard. Inside I had taken much of what I already owned and applied my creativity. With projects like my drop cloth curtains, painting my walls and chalk painting old furniture I had breathed new life into my home. All was achieved with hard work on a minimal budget. Thinking about my inside success I asked myself, why can’t I do this to my backyard?
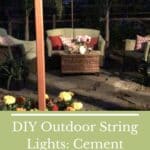
Project Begins: Outdoor String Lights – Backyard Makeover
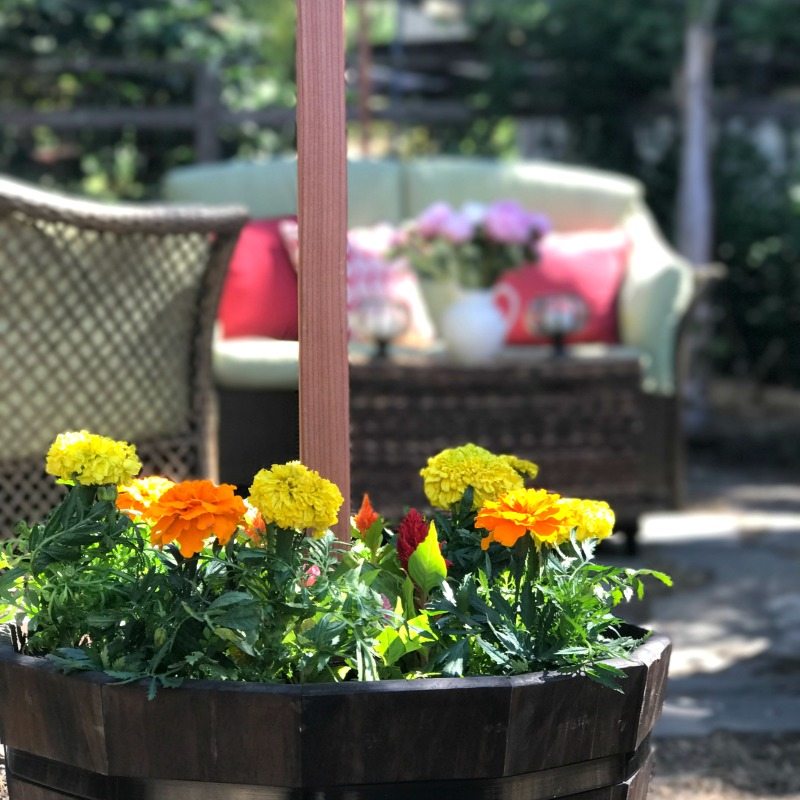
- First, I located some outdoor furniture that my neighbor had gifted me last year that was still sitting piled up in our garage. I brought it out and placed it on our little stone patio where our outside table had been.
- Next came a wicker trunk that we weren’t really using inside to serve as a make-shift coffee table.
- Searching through my storage, I found some faux plants, and all of a sudden it started to look like a destination. I began to imagine that this space could actually be a place we could enjoy. Yes, it was still in the middle of a dirt yard, but I started to see past the dirt to what was possible. And I was getting excited.
I had seen pictures of outdoor string lights that created beautiful magical settings, and I got an idea. Actually, it was Julie’s idea. Here’s what I did:
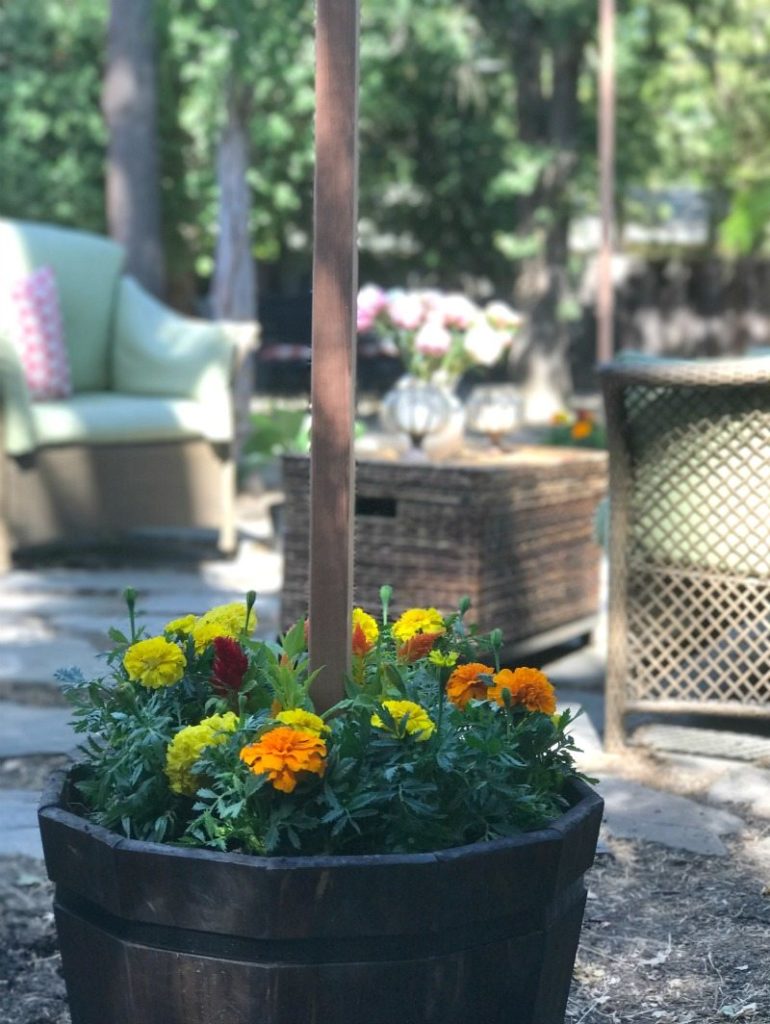
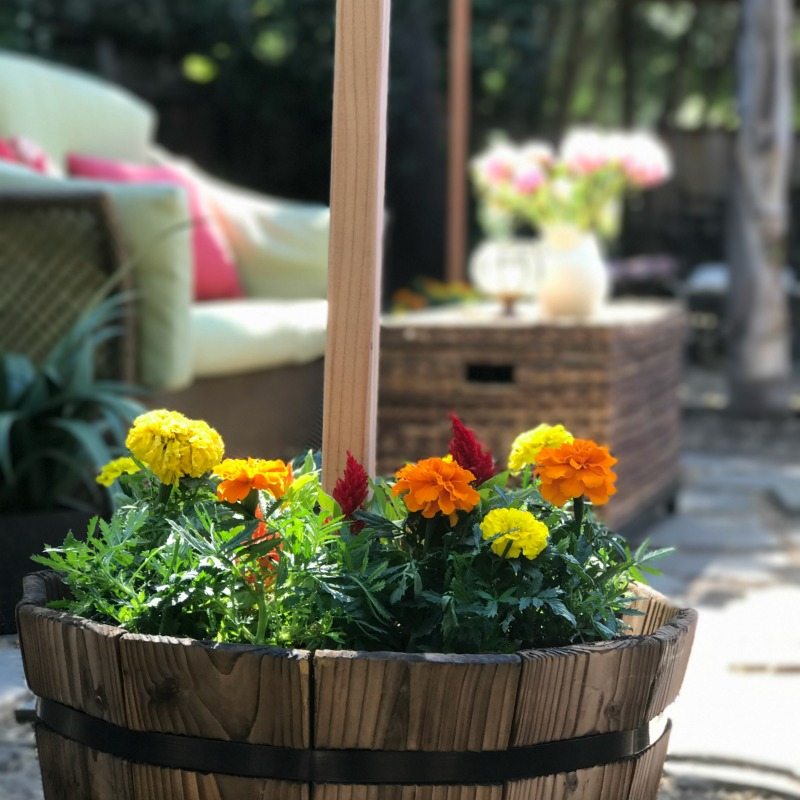
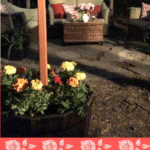
DIY Barrel Planters with Posts to Hang Outdoor String Lights
Supplies:
- solar powered LED outdoor globe lights
- 4 Barrel planters or similar container
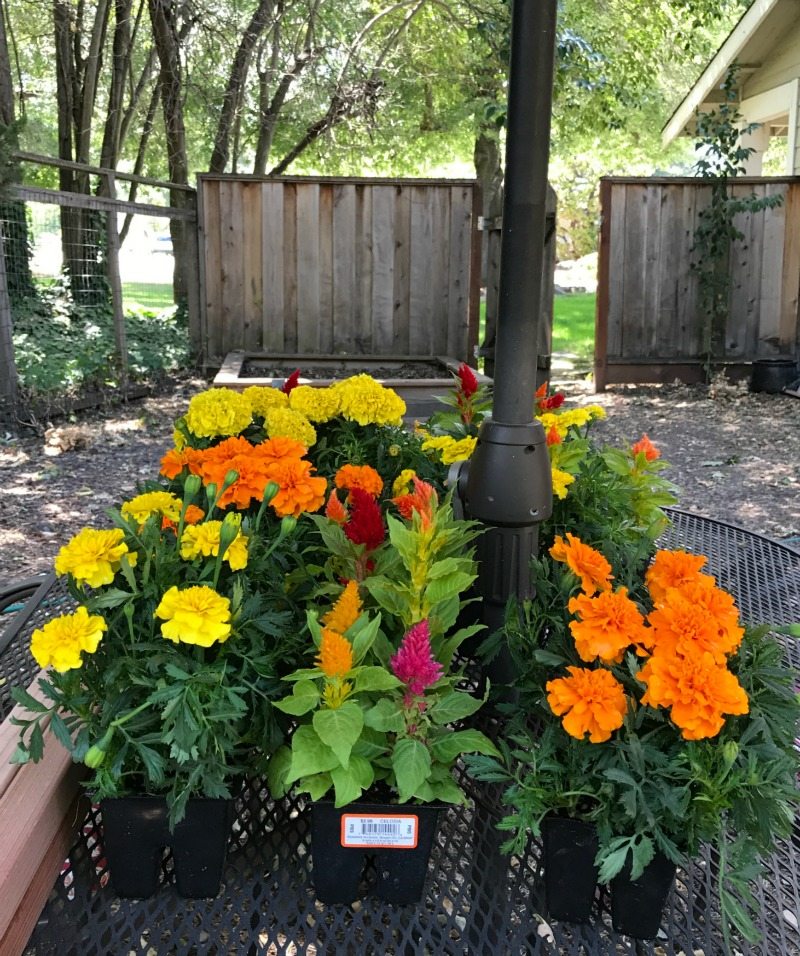
- A variety of plants to fill planters
- 4 1″ x 1″ square posts (if you can find round ones you like those would be great too)
- Nuts and bolts to fit and secure
- 4 1.5″ plumbing pipes about 10″ long
- 4 base fittings for the plumbing pipes
- Small plywood scraps to secure to the bottom (to add strength)
- 4 hooks to hang the lights from and wrap the extra wire around
- Planting soil
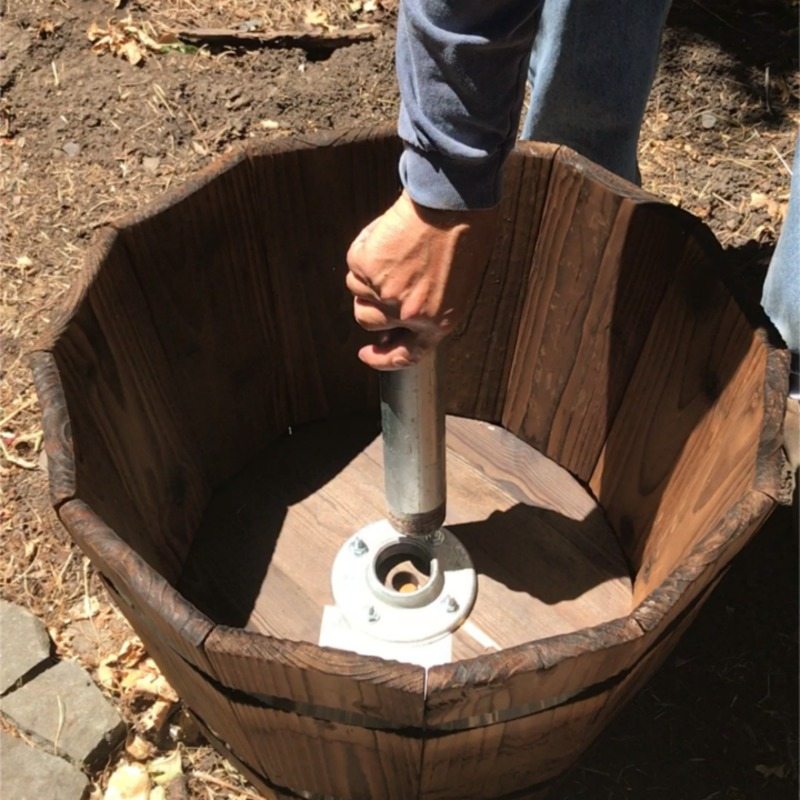
Watch this video to see how we secured the outdoor string lights poles into the planters.
Attach the plumbing pipe to the base fitting.
Attach Your Outdoor String Lights to the Posts
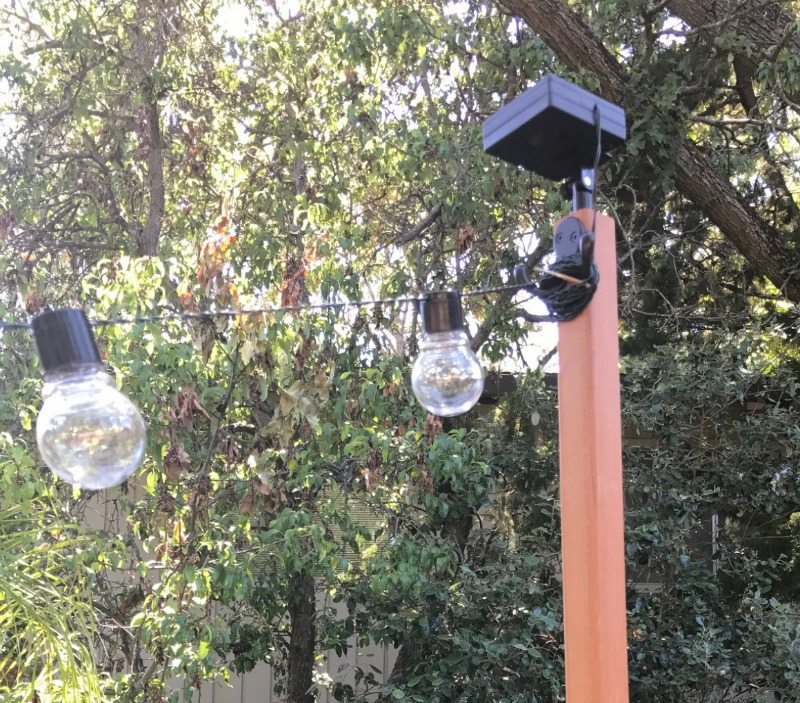
- Secure your hooks on the top of the posts with screws (use and electric screwdriver if available.)
- We linked two 15′ light strands together using green floral wire to extend the length of the distance between the posts.
- Attach the lights to one side leaving just enough wire to attach the solar panel to the top of the post. Wrap the extra wire around the hook.
- Place post into the plumbing pipe to stand it up in the planter barrel.
- String lights across the area and attach the other end in the same way.
Choose Your Outdoor String Lights
Researching outdoor string lights, we quickly realized solar was the way to go. Our criteria was:
- fun style
- solar
- good quality/durable
- reasonably priced
- respected brand
- safe
When choosing your string lights keep in mind these features:
- We like plastic which makes them safer and a lot more durable than glass.
- Solar means inexpensive, environmentally friendly, easy to install, and can be hung anywhere! You just put the solar “catcher” in the sun nearby.
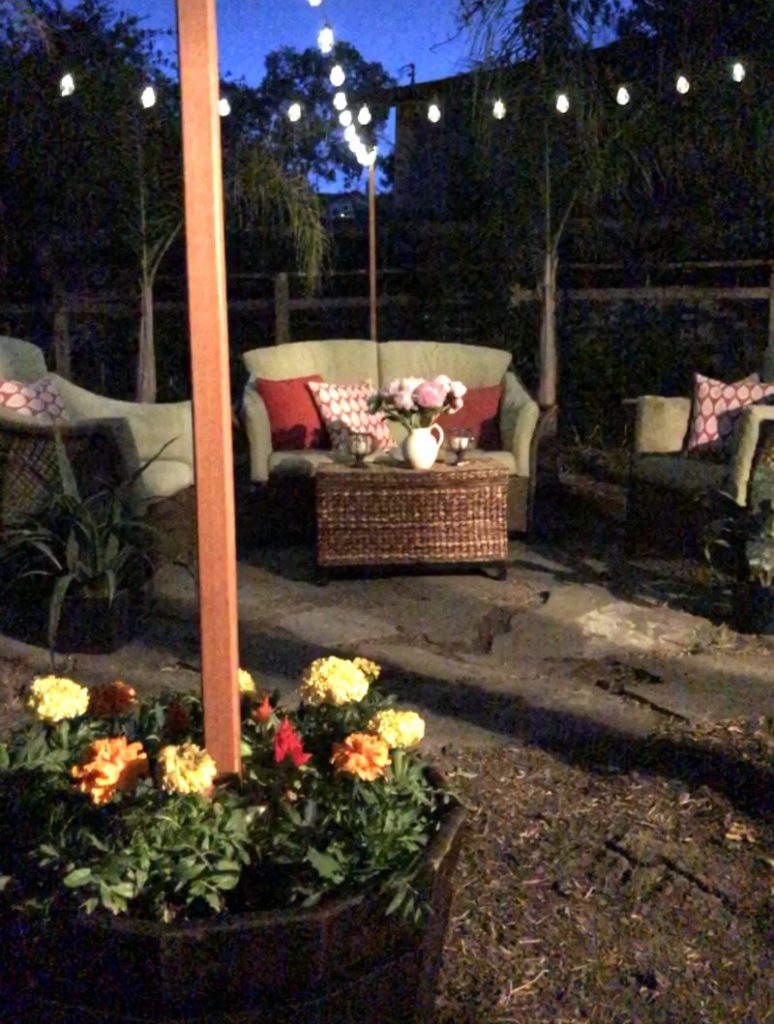
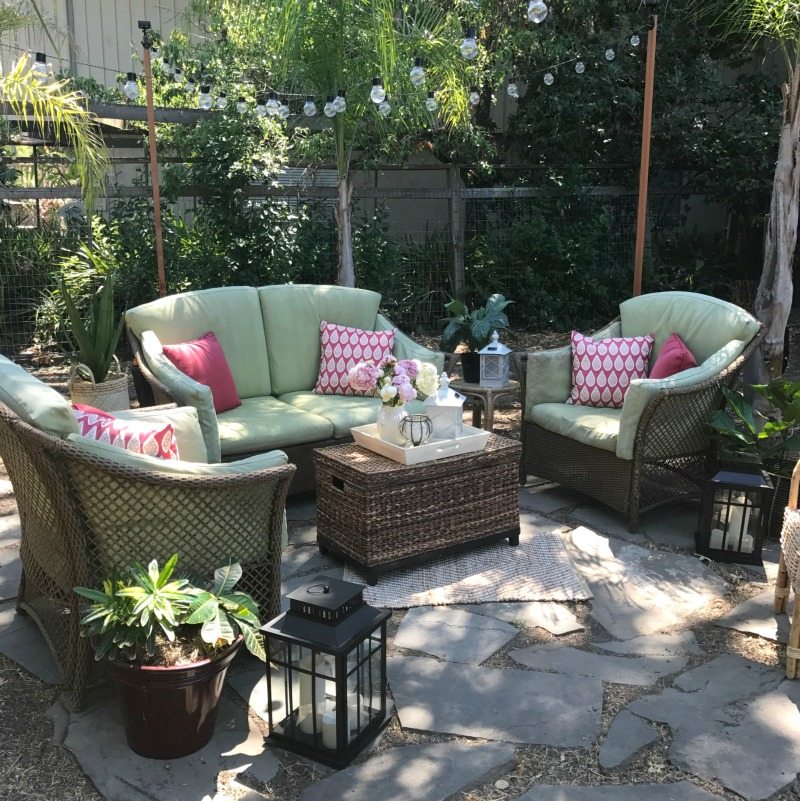
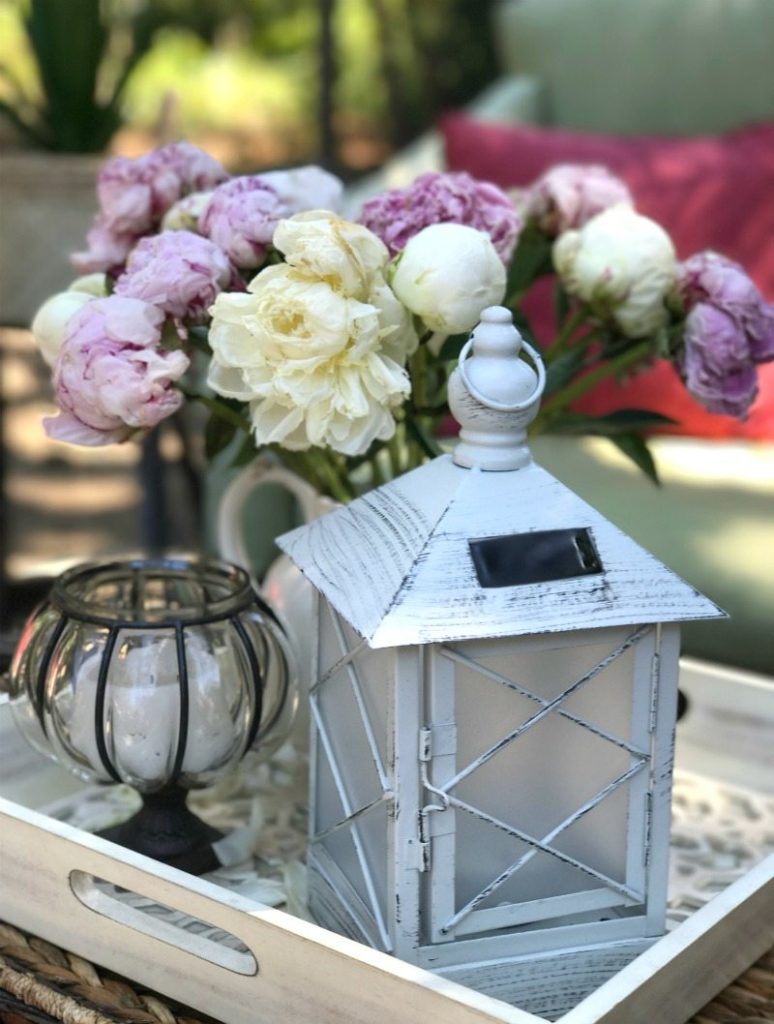
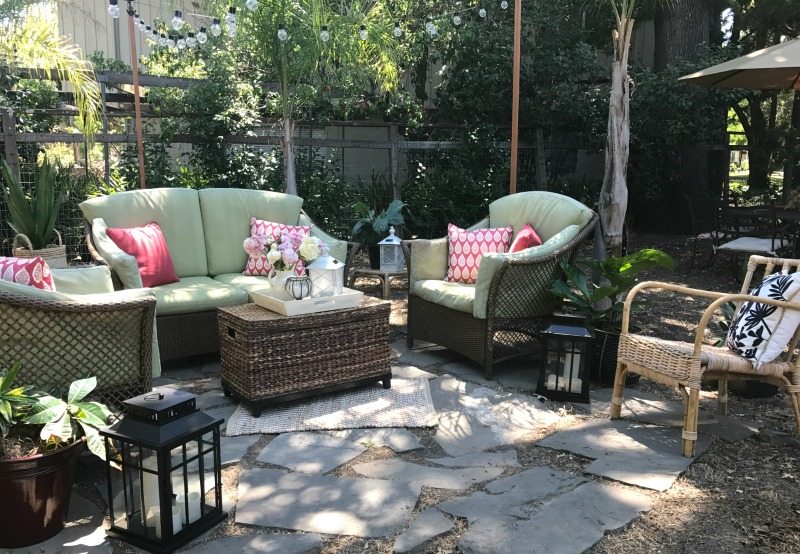
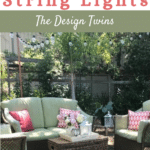
Backyard Finishing Touches
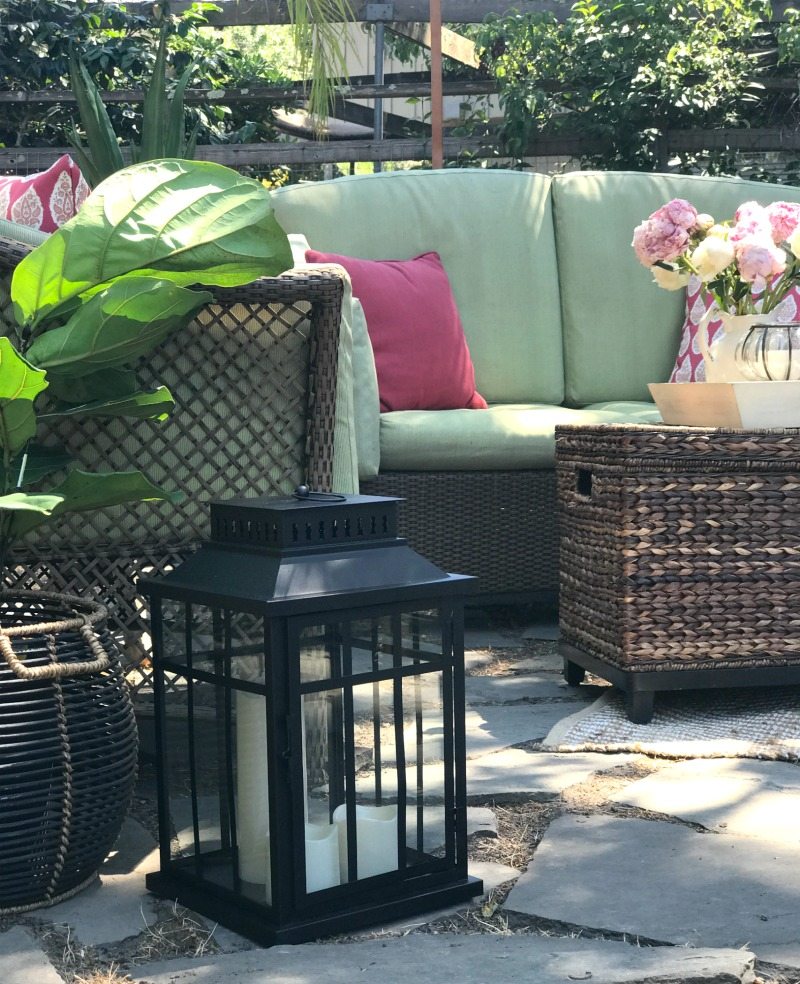
- I set up my outdoor furniture on the patio.
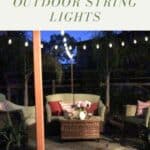
- The outdoor string lights created a visual frame for my patio.
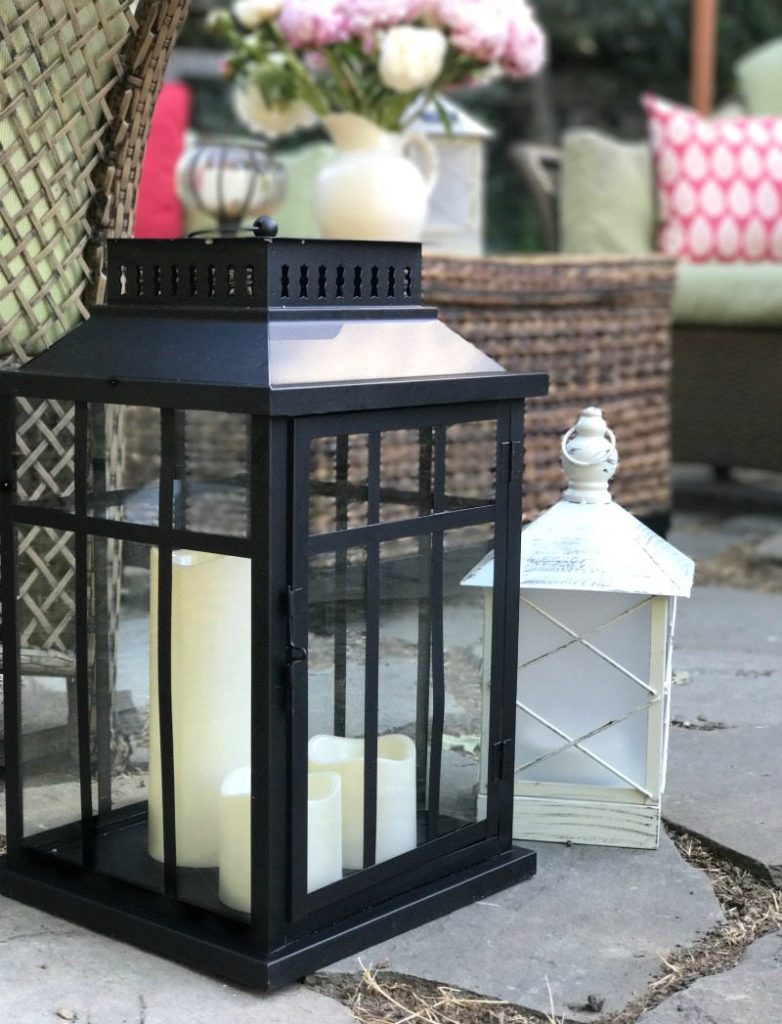
- The final step was adding the all-important details:
- fun multi-colored outdoor pillows
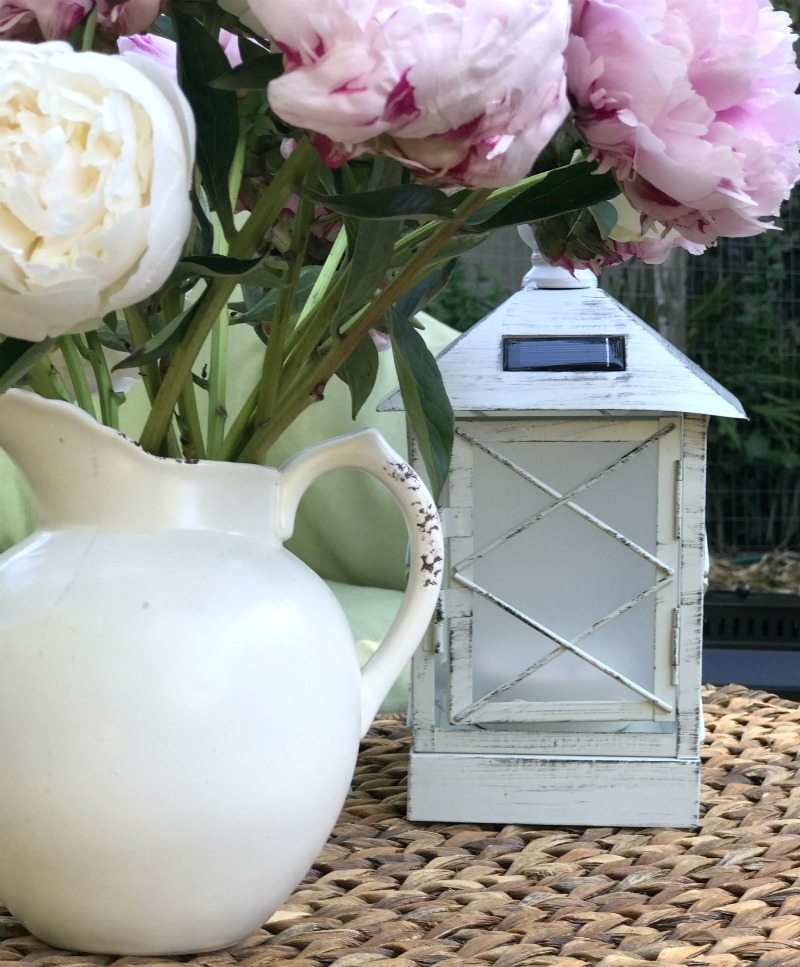
- lanterns
- plants, both faux and real
Some Lessons Are Hard to Learn
Wow. It had been nine years, and our backyard had been a source of sadness to me. I would look out the window and see the dirt and think of the dreams we had that were still out of reach. I would think of what couldn’t be. And I would turn away. My only coping strategy was to try not to think about it. I would try to focus on what I did have, but that was always limited to inside.
Finally, my project was complete, and I was tired. It was at the end of a long day of solid work carrying dirt and planting flowers, and I sat down on my hand-me-down furniture in my backyard for the first time.
There were flowers, there were outdoor string lights, there were bright colored pillows. As I sat down, I realized I didn’t even see the dirt anymore.
What I saw was a beautiful canopy of trees. I felt the soft breeze and enjoyed the wind blowing through the palms around us. The only sounds were the birds and the breeze through the trees.
The space around me was so comforting and it was so private and cozy. I was surrounded by trees and by and old fence but with enough space to feel actually spoiled.
In the end it’s hard to believe it took me nine years to stop feeling sorry for myself and just enjoy what I had. I was so consumed with wanting it to be perfect that I missed out on all those years of just appreciating the beauty that was there the whole time.
Be sure to check out this article for more budget-friendly backyard DIY ideas?
Cheers to looking at the glass half full, Friends!
Blessings,


A joy to watch the transformation! I love that you made it a family affair and had hubby star in the video. Enjoy your new found patio retreat!
Mandi, Yes, that video was totally real life. We try to make as much as possible “a family affair”. My boys are very into projects (they take after both their dad and me), so it makes it that much more enjoyable and satisfying. So glad you enjoyed this post 🙂 Blessings to you, Jodie & Julie
This looks amazing! What a wonderful lesson to all of us!! I am going to look up those solar lanterns. Love them! Wanted to ask, do you leave your cushions out all the time?
Hi Angela, Thank you so much. It rains very little during the summer so they will stay out all summer, but when the weather turns cooler I will bring them in for the late fall through winter until the rains stop (or at least slow) in the spring. Have fun with the solar lights/lanterns. They all work like a charm to add easy lighting to any outdoor spot. With gratitude, Julie & Jodie
So beautiful!! I just love the transformation! You’ve inspired me to get some of those solar lights!! Thank you for sharing your story, it’s a good reminder for all of us to look at the glass half full!! Enjoy!!! ????????
@myfrenchcountrystyle
Denise, Thank you so much! We appreciate the kind reply and generous compliments. It really and truly was an amazing reminder that attitude is everything. And to begin with gratitude is the only way to live and be happy. Blessings to you, Julie & Jodie
Jodie, this is amazing. Your backyard has come to life. Bill always has terrific ideas on how to make the most of a back yard space. Excellent job, you guys.
Bette,
Thanks for cheering us on! We love it and appreciate you so much. We just love to see you on here…Missing you! With love, Your Twins
Love what you created! It’s amazing what you can create out of almost nothing on such a smart budget. I had a dinner table taking up my whole little patio for years and I hardly ever went out there. Then I changed it similar to what you did, with a “living room setting” and now it’s my favorite hangout.
Love outdoor string lights, year round!! They add so much ambience to a space! Your backyard looks great!!
Marci, We are so glad you think so! This was a great project and obviously taught our family a lot. Now we are enjoying our backyard for the first time and feel nothing but gratitude. Julie & I appreciate your love and support tremendously. XO ~ Jodie & Julie
Ahhh…I’ve seen so many tutorials and you’re right I, too didn’t want to go with cement. I’ve been wanting to do this since my oldest graduated from high school two years ago. Now my middle daughter will have her graduation party in style in the spring with these solar bistro lights and the cutest pots ever!
The video was very helpful!
You’re the best!
Thanks,
Jodi
Aw, Jodi, you are too sweet and we just love it! So very happy to hear that this post (and video) were helpful. Sounds like you’ve got plenty of time between now and the spring to get after this project. We say go for it. It literally transformed our backyard space! With gratitude, Jodie & Julie
The space looks incredible! Such a transformation! You have inspired me!!
Paige, Thank you so much! We aim to inspire so that’s just a great compliment. Wishing you all the best, Jodie & Julie
I am having issues finding a 1.5 inch plumbing pipe. The largest I can find is 1 inch which feels way too small. Where did you get your pipe from?
Patrick, I’m not sure where you shopped but we fouund ours easily at Home Depot. Good luck on your project! All the best, Jodie & Julie
i finally found a 1.5 plumbing nipple on amazon. I do have a question though. You said a 1×1 post. I have not found a 1x 1 but I did find a 2x2x8 which is really a 1.5 by 1.5 inches by 8 feet. Does that sound like that might work with a 1.5 inch pipe nipple? Also I am not using wood barrels but a rosen barrel which is more like recycled thick plastic. Do you think since I am not using a wood barrel i still need the plywood under the barrel?
Hi Patrick,
We used the 1.5″ pipe and still had to shave off some of the 1″ x 1″ square post in order to get it to fit so I don’t think the 1.5″ post will fit.
We used the wood board under the barrel for extra stability….I don’t know how sturdy or thick your rosen barrel is. It is up to you, but I would opt to add the stability to help maintain the durability and strength of the posts over time.
Wishing you the beset of luck on your project!
Jodie
Did you use pine 1×1’s? Did you treat them at all with stain or paint and are they still holding up against rot and decay?
Hi Patrick,
We didn’t add any treatment on the posts. They have weathered fine. It’s been 2 years and they still look good.
Thanks for all your questions!
All the Best,
Jodie
Hi, love how everything came out. It looks beautiful. Question, how did you attached the solar panel to the top of the post? I see the solar panel it’s on top, how did you manage to do that. We tried, and it’s not working out. Thanks 🙂
Jessy,
Sorry you are struggling getting the solar panel attached to the top of your pole. We didn’t have any trouble. We used a power drill to screw it to the top without difficulty. Good luck, Jodie
Like your designing idea..thx
WPC deck tiles
Very creative outdoor string lights! It helps set the mood and keep everyone comfortable. It’s time to get your outdoor landscape into shape and make it stand out with these helpful ideas.
Thank you so much! You’re absolutely right. Creating this project motivated us to spruce up the rest of the backyard too. You know how that always works…one project leads to the next! It’s all good 🙂 XO ~ Jodie & Julie
What a great article! I have used solar lanterns and lights for years and love them. A real lesson to be Lear from what you wrote. Thank you for sharing.
[…] (adsbygoogle = window.adsbygoogle || []).push({}); Best DIY Backyard Lighting from How to Hang Outdoor String Lights Video and Easy Tutorial. Source Image: http://www.thedesigntwins.com. Visit this site for details: http://www.thedesigntwins.com […]
I found it interesting that some lanterns are solar power and you don’t have to worry about lighting a candle to it. My wife told me that she wanted to add lights to our outdoor. I’m going to let her know about solar power lanterns to avoid worrying about turning it on or off every night.
Ron,
Yes, it’s crazy isn’t it? We hope you found this post helpful and are excited to tackle the next outdoor lighting project.
Best of luck,
Jodie and Julie
[…] Best DIY Outdoor String Lights from How to Hang Outdoor String Lights Video and Easy Tutorial. Source Image: http://www.thedesigntwins.com. Visit this site for details: http://www.thedesigntwins.com […]
Illuminate every inch of your life with Inflatable Solar Lights for indoors and out activities. Our portable, packable, hangable lanterns and lights are engineered to brighten up any situation, from an emergency outage to a night in the backcountry.
[…] Best DIY Outdoor Lighting Without Electricity from How to Hang Outdoor String Lights Video and Easy Tutorial. Source Image: http://www.thedesigntwins.com. Visit this site for details: http://www.thedesigntwins.com […]
[…] Best DIY Outdoor String Lights from How to Hang Outdoor String Lights Video and Easy Tutorial. Source Image: http://www.thedesigntwins.com. Visit this site for details: http://www.thedesigntwins.com […]
[…] Best DIY Outdoor String Lights from How to Hang Outdoor String Lights Video and Easy Tutorial. Source Image: http://www.thedesigntwins.com. Visit this site for details: http://www.thedesigntwins.com […]
[…] (adsbygoogle = window.adsbygoogle || []).push({}); Best DIY Outdoor String Lights from How to Hang Outdoor String Lights Video and Easy Tutorial. Source Image: http://www.thedesigntwins.com. Visit this site for details: http://www.thedesigntwins.com […]
[…] Best DIY Outdoor String Lights from How to Hang Outdoor String Lights Video and Easy Tutorial. Source Image: http://www.thedesigntwins.com. Visit this site for details: http://www.thedesigntwins.com […]
[…] Best DIY Outdoor String Lights from How to Hang Outdoor String Lights Video and Easy Tutorial. Source Image: http://www.thedesigntwins.com. Visit this site for details: http://www.thedesigntwins.com […]
Your patio is beautiful! I especially like the furniture. What is the brand?
Marianne,
Aw you are so sweet thank you my friend! That means so much to me. Unfortunately, the furniture is 20 years old from a neighbor.
Lots of love,
Jodie & Julie
Did i miss the video? I’ve clicked on every picture and nothing links to the video. Can you link it here in this message?
I’m sorry Rho. I tried to link the video into the comment and it doesn’t work. However, the video appears clearly working in the post, so I’m not sure of the problem. Sorry for the inconvenience. ~ Julie
Is there a way to get the video? There is nothing to click on
Hi Davie,
Sorry about that. It appears in the post from all the computers we have checked, so we are not sure why it doesn’t appear for all. It’s on our YouTube and here is the bideo link
https://www.youtube.com/channel/UC5WHR8KmOD0n1lZ5t9fQ9Lw
I’m having the same issue. It seems where the video should be there is just white space. I tried different browsers without any luck.
I can’t find the video either! Frustrating.
Gina, I’m sorry it’s not working for you. The link works on every computer we’ve tried, and exists on our YouTube channel as well. Visit
https://www.youtube.com/channel/UC5WHR8KmOD0n1lZ5t9fQ9Lw
video tutorial information is very good. i am also like this.
outdoor string lights video tutorial is very nice. i am really like this
very good information for outdoor string lights video
Interesting to read. Very useful guide on Hang Outdoor String Lights by Yourself.
I love your ideas please keep up the sharing!
i am really like this command. this tutorial very helpful for me.
video tutorial about outdoor string is very good
Thanks for the writing this blog on Outdoor
I love your stone patio and I’m not sure how it would work with your climate, but it could be fun to fork-till the dirt between then and sow thyme seeds.
thanks for taking time and sharing this information with us
Thanks for sharing this beautiful content. I am an led bulb producer but i love your content.
great platform. thanks
Great Job.. all good things take time but that doesn’t help with the frustration I get it. Now you have your own little oasis.
Exactly Patricia! Thank you so much for your kind reply. Best wishes, Jodie & Julie
I think you used 2 x 2 posts (actual size is 1.5 x 1.5) since a 1 x 1 has an actual measurement of 3/4 x 3/4, which would fit too loosely (and not need trimmed) in a 1.5″ inner diameter pipe.
So strange, but we think you are right! Thanks for the comment 🙂 Best, Julie & Jodie
What an inspiring post! Great job, it looks beautiful. 🙂
Thank you Jess! This was one of our favorite projects. We’re so glad you liked it too. Hope you continue to enjoy our blog. Sincerely, Julie & Jodie