


budget-friendly dIY Chair decorations, Beautiful and Versatile Décor for any season, holiday dining room decor
Follow our step-by-step guide to creating gorgeous, easy and budget-friendly chair decorations. We share our best ideas for any occasion or style. Let’s jump right in.
If you are you looking for gorgeous decor on a budget (like we always are) then you are going to love this easy DIY craft.
Nothing makes us happier than creating beauty in our homes, except when we can do so without breaking the budget (and our hubbies appreciate it too).
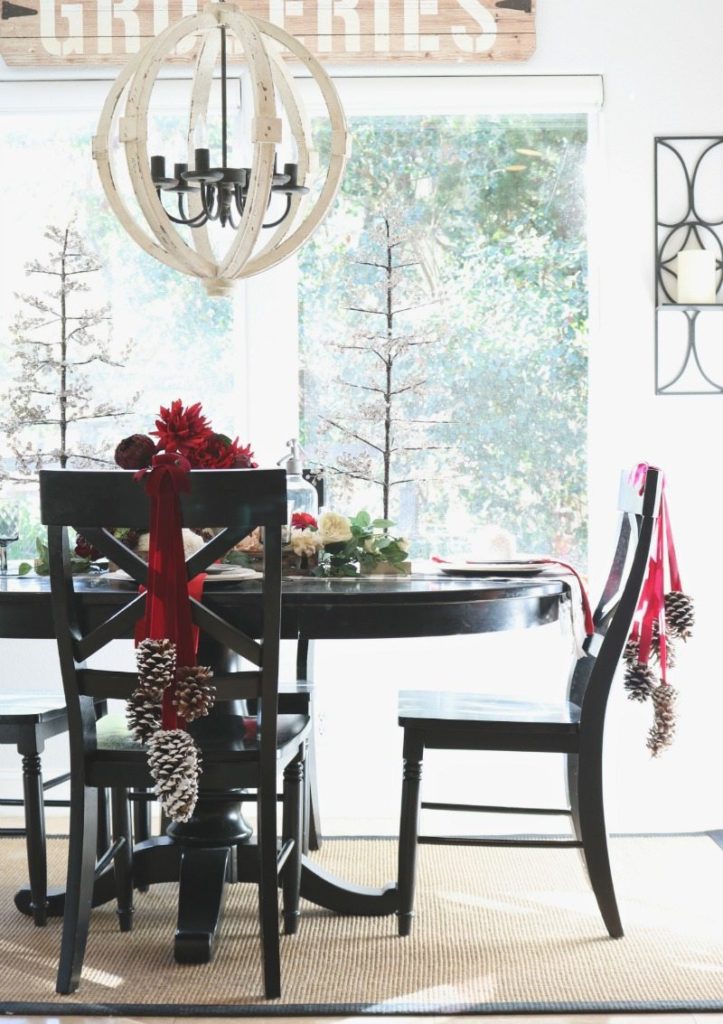
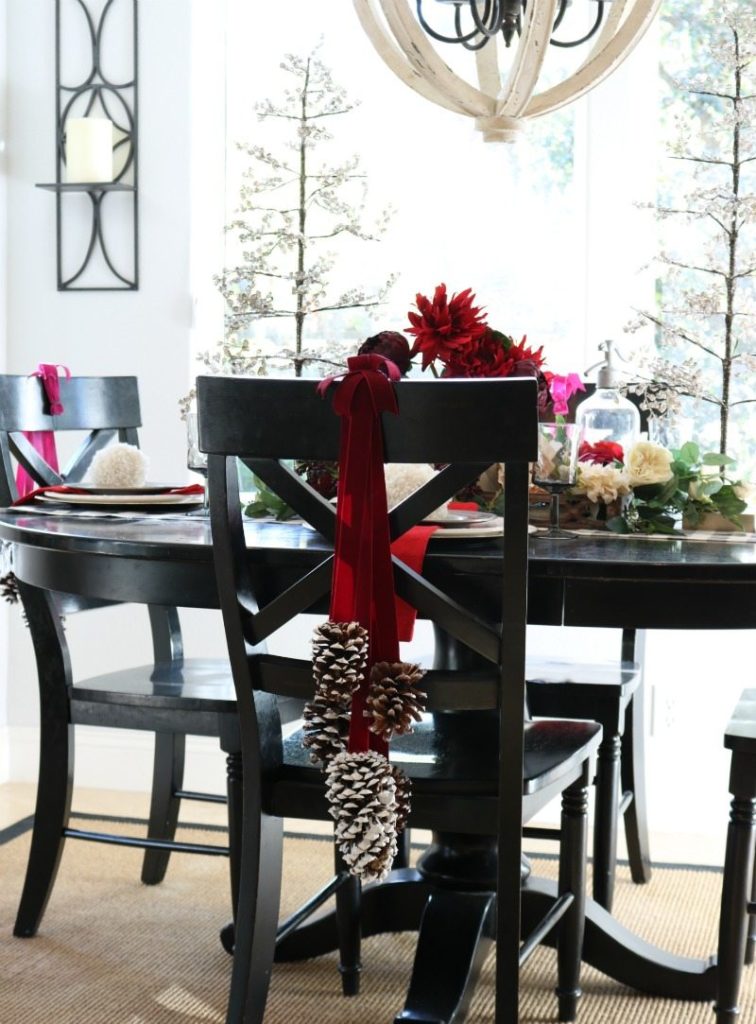
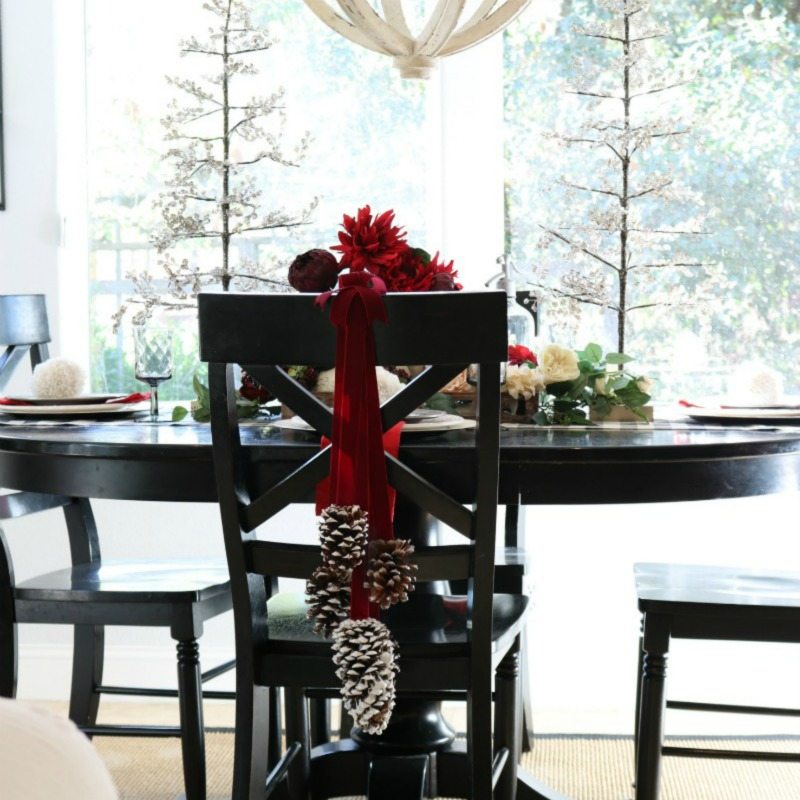
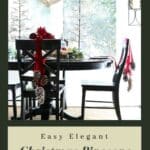
Julie and I always love the look of decorated chairs. Whether you are looking to create an elegant look for the holidays, a special event, or a wedding, these darling and inexpensive chair decorations will have you smiling and your guests oohing and ahhing.
We also want to welcome you to our November Holiday Blog Tour. Whether you are focusing on entertaining family and friends for Thanksgiving or jumping right in to the Christmas spirit, we are sure you are going to find lots of fun crafts, recipes and ideas to make your holidays extra special.
Don’t forget to check out all the fun ideas my talented friends have come up with. Links are provided at the end of this post.
Disclaimer: We have included some affiliate shopping links for your convenience.
Create Stunning Budget-Friendly Chair Decorations: The How-To
Supplies for Four Chair Decorations
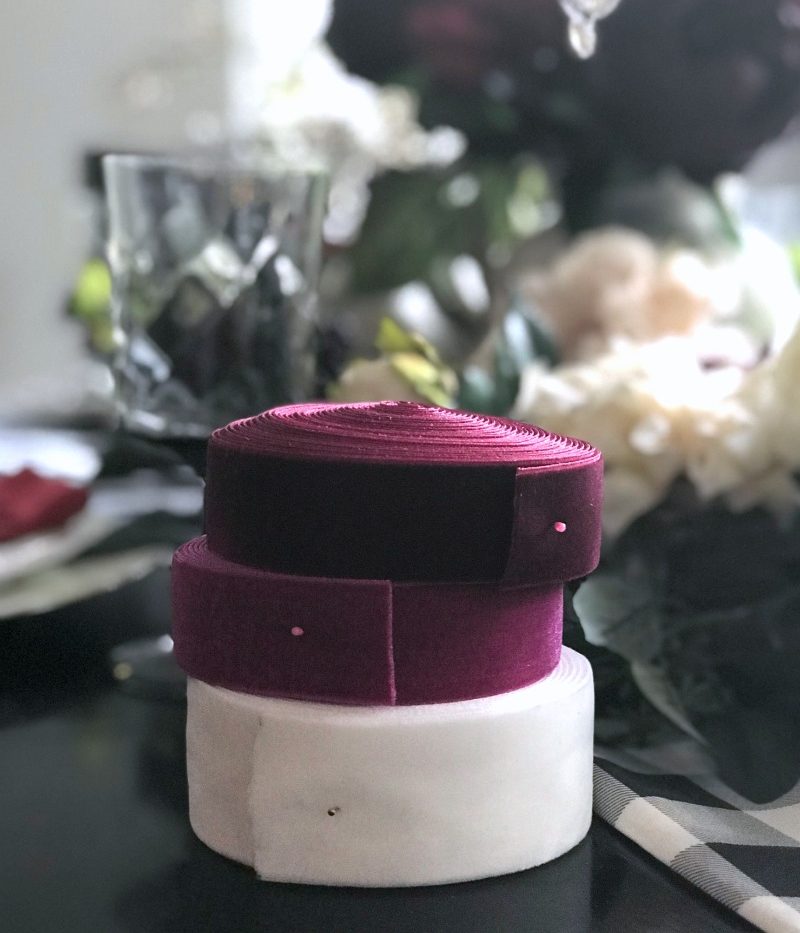
- 5 yards 25 mm Burgundy Velvet Ribbon
- 5 yards 25 mm Magenta Velvet Ribbon
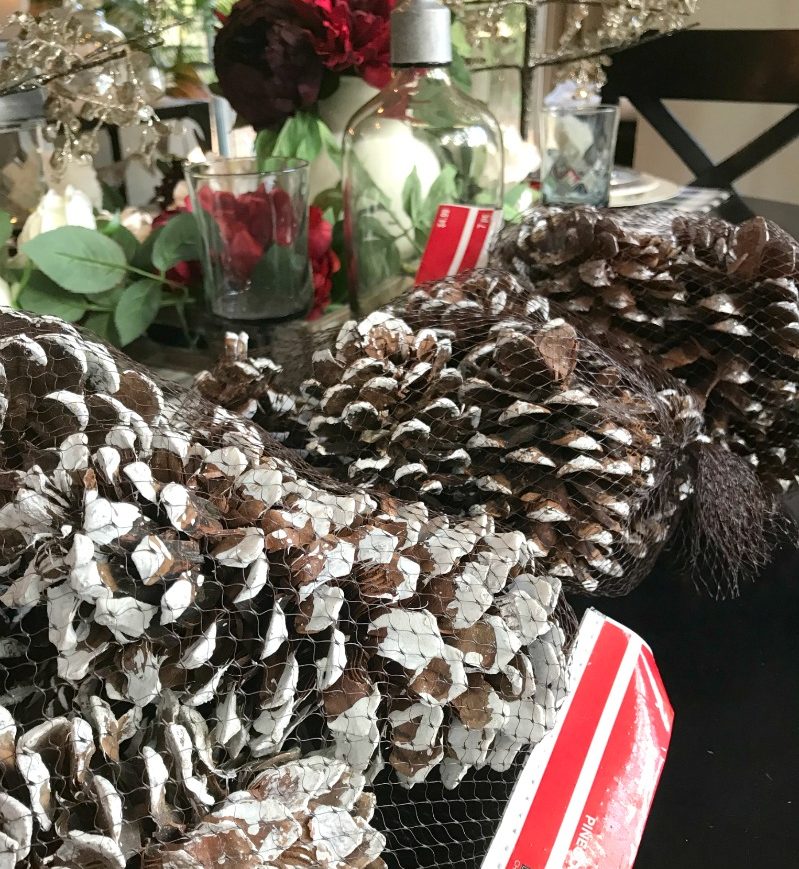
- Pinecones, flocked with white or silver paint. I bought mine already painted, but if you can find your own and paint them yourself, this would be a fabulous way to make this even less expensive.
- Glue Gun
- Green floral wire

Note: The quantity of ribbon worked perfectly for four chairs cutting the lengths of ribbon as specified below.
Follow These Steps to Create Beautiful Chair Decorations
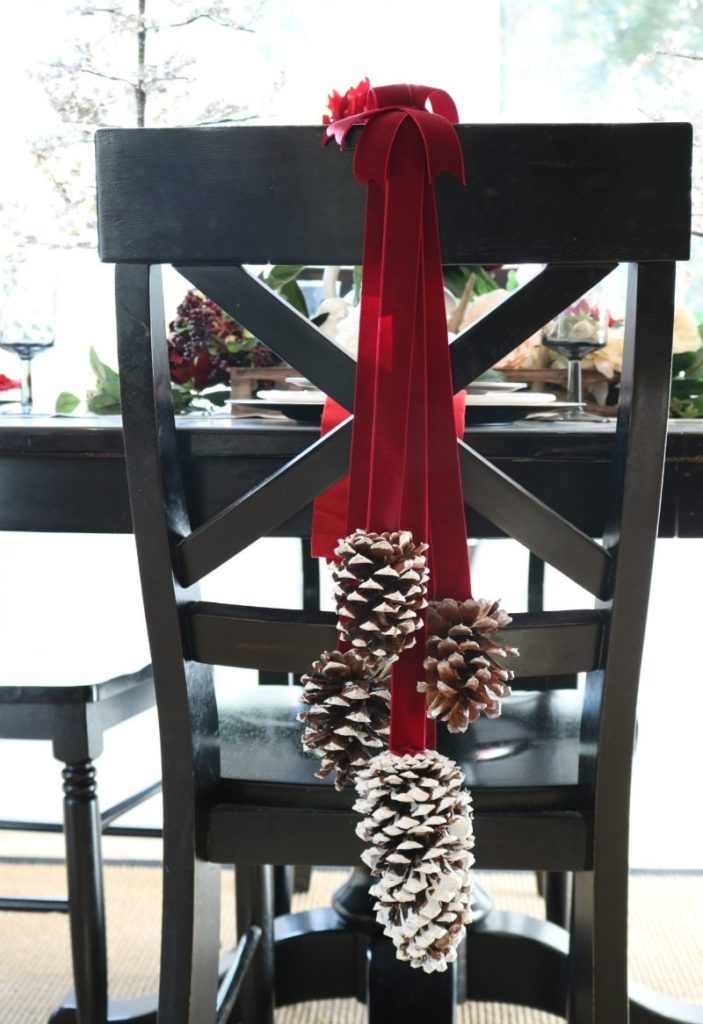
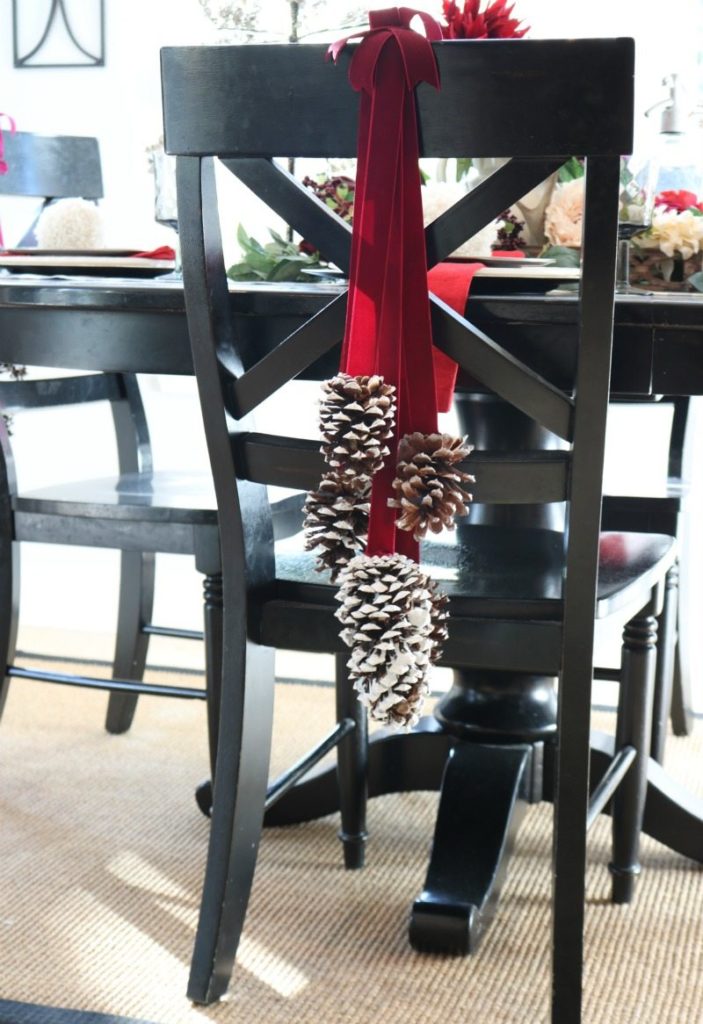
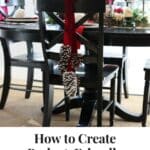
- Begin by cutting five strips of velvet ribbon for each chair in varying lengths. I decorated four chairs, so I had a total of 20 strips. I cut mine at 14″, 16″, 18″, 21″ & 22″ (see photo below).
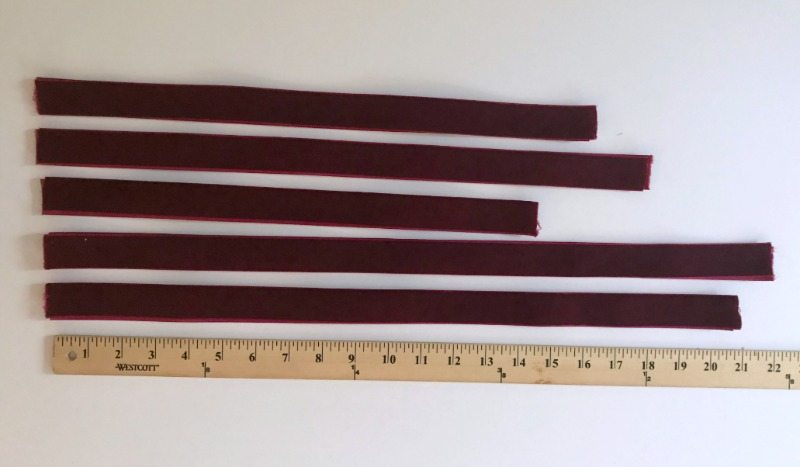
2. Cut 5 2″- 3″ strips (x number of chairs) for the top ends that you will add to each chair as the last step. Set these aside.
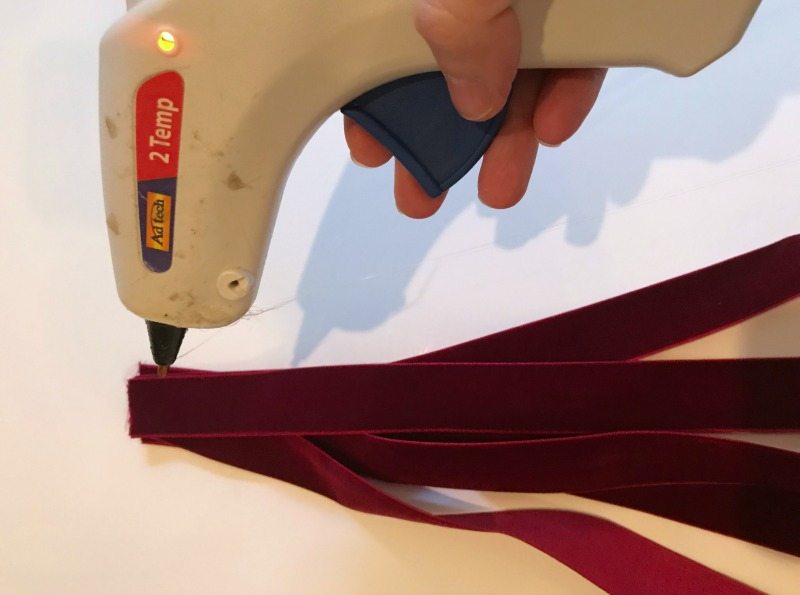
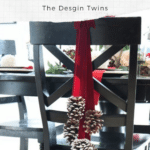
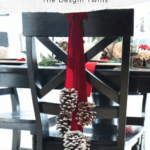
3. Next, attach each ribbon to a pinecone using glue gun. Allow to cool.
4. Then, arrange five pinecone ribbons so that they create an alternating, layered collection that you like.

5. Attach the ends of five pinecone ribbons together by stacking them one on top of each other and securing with hot glue. Do this for each chair set. I had four chair decorations sets for my four chairs.

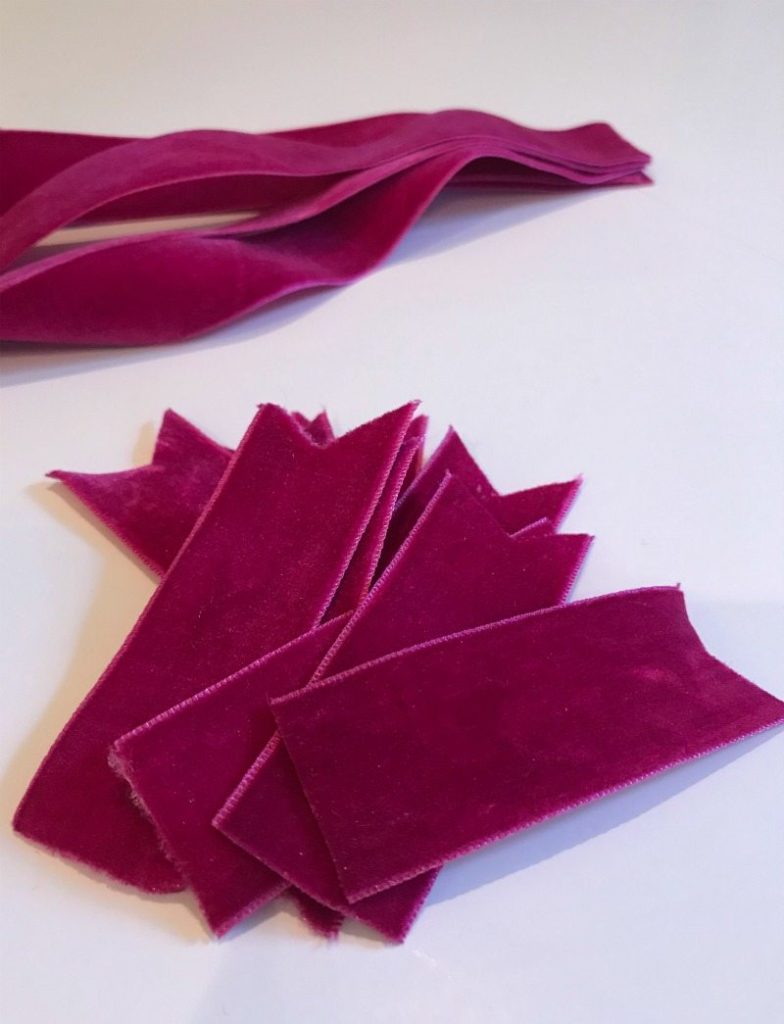
7. To create the frill of the ends sticking up on the top of the chair use the five end pieces that were already cut. Cut a dart into one end of each piece and hot glue onto the top edge of the ribbon stack.
Chair Decorations: Alternative Method
After completing the project, I thought it looked cool, but I quickly realized I could have chosen another way of putting this together.
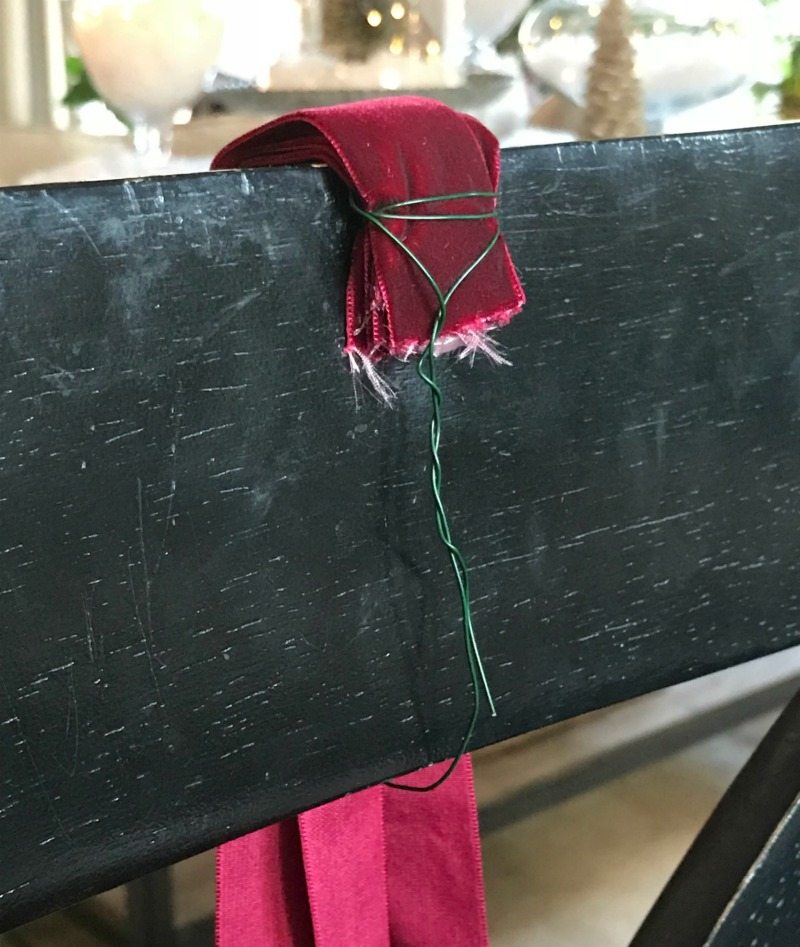
- Instead of gluing the five strands together at the top, simply tie them in a knot and let about two to three inches open at the end. You may choose to cut the ribbons a couple of inches longer so you can have the extra sticking up on top.
- Cut the ends with darts to create the look that I created by gluing on the extra ends.
- To attach the ribbons to the chair you could run the floral wire through the knot and secure around the top frame of the chair like I did above.

Variations for Chair Decorations
This same chair decorations idea can be changed up depending on your personal preferences. Choose one of these variations based on your event theme, the season or come up with your own.
Swap out the pinecone chair decorations and instead use:
- ornaments
- faux fruit
- bells
- item tied in with the theme of your event

Ribbons:
- use multi-colored ribbons
- match the ribbons to your color theme of your party or event
Why We Love This Project
This DIY chair decorations project has all the essential components we look for in a decor project.
It’s…
- beautiful
- inexpensive
- easy
- versatile
Have fun and use your imagination. We hope you’ll comment below and tell us your ideas. If we like your ideas, we may add them to the post.
Looking for more easy, inexpensive and versatile craft projects? We’ve got plenty.
Check out some of our favorites here:
Learn How to Create Stunning Macrame Decor | How to Transform Your Decor with Easy Wall Art
Brown Paper Packages | Easy Tutorial to Create Stunning Garden Chandelier | Arm Knitting Made Easy
Welcome to our monthly Creative Blog Hop
This month it’s all about Thanksgiving projects and yummy recipes where you’ll find lots of inspiration to keep you DIYing and nibbling for months.
Meet your hosts:
Carolanne @ Sassy Townhouse Living | Lynn @ Nourish and Nestle
Tara @ Lehman Lane | Sam @ Raggedy Bits
Sherry @ Savvy Apron | Katrin @ Rustic Chic Thanksgiving Table Decor
Janine @ Happy Happy Nester | Ashley @ Modern Glam
Sara @ Twelve On Main | Jodie & Julie @ The Design Twins
Michelle @ Our Crafty Mom | Kellie @ Gratefully Vintage
Grab some Thanksgiving Inspiration


This is such a cute idea, I never decorate my chairs 😉 Love that they can be up all the way til Christmas too! Very lovely!
Dear Katrin,
Thank you, Sweet Friend, for visiting our blog and for taking the time to leave a lovely reply. So glad you were inspired by this simple craft. I really am happy with the final result. Blessings, Julie & Jodie
Jodie,
LOVE this!!! You are such a wealth of great ideas and I’m amazed at all that you create! I love your gorgeous ribbon and now have ribbon envy among all the rest of the things I envy in your home! Thank you, my sweet friend, for joining our blog hop!
Janine,
You are one of the greatest blessings Julie and I both count in this blogging journey of ours. You touch our lives in some way every day for the sweeter and the better. Your kindness and joy come through in all you do. We hope you know how precious your friendship is to both of us. With love, Jodie & Julie
What a gorgeous idea! I love those dipped pine cones!! Your table looks so welcoming and cosy!!
Sam, Thank you so much for those sweet words. We are so grateful to be connected once again on this fun craft tour. We hope the fun continues through next year and onward. From across the globe, we appreciate your friendship! With love, Julie & Jodie
These are gorgeous! I am in love with that deep red velvet ribbon. And I always love pinecones this time of year. Bravo!
Dear Ashley,
Thank you, Honey, for your kind appraisal! Coming from someone whose taste is impeccable it really means a lot. We feel extra blessed to be growing in friendship with you, and Julie and I look forward to continued friendship in 2018! With love and blessings, Jodie & Julie
Very pretty.
This year I’m doing wreaths on my dining chairs. I’m trying to figure how to make them look frosty, without glitter (which would probably be constantly on the floor. I’m thinking about adding seed pearls with glue.
Last year I had a woodland theme, I wish I’d have thought of pinecones for the chairs.
Sherry, Wow, we love hearing about your decorating ideas. Keep this one in your “back pocket” for another year…good luck with your frosty wreaths. We have a strong feeling you’ve totally got this! So glad you are enjoying our blog. We hope you will continue to come back often. With gratitude, Julie & Jodie
what a beautiful cleaver way to make chair ornaments! they came out so beautifully & festive!! And it is so much fun to do this blog hop with you talented twins 😉
Aw Kellie,
You are so sweet! Thank you so much for the words of praise. It really means a lot. To be connected on this tour with such talented and lovely friends really humbles us. We learn so much from you and the other amazing women. Blessings to you, Julie & Jodie
Oh my gosh, how I love this idea! Those pinecones are stunning! I can never find such nice ones around here and end up ordering on the net. What a beautiful and festive decor idea. Everything looks like perfection!
Dear Carolann,
We are so glad you enjoyed this craft post! There are so many reasons why we love being connected on blog tours, but one of them is sharing with like-minded people and learning from each other. It really is a blessing, and we hope we have many more opportunities to learn and grow together. With gratitude, Julie & Jodie
I absolutely love what you did with these chairs. It could be changed up year after year.
I have padded chairs with no way to attach decor. Any ideas?
Ralinn,
I would suggest tying the ribbon around the chairs securely. I think it could actually look beautiful that way. My only concern is the weight of the pine cones. They might be a bit heavy. It depends on how secure the ribbon is and if it is going to slip (based on fabric and shape of the back of the chair). You might try hanging lightweight ornaments for this if weight is an issue. Have fun and good luck. With gratitude, Julie & Jodie
great idea, I do something like this on my stairway garland. now if you had full fabric back chairs how would you recommend attaching the pinecones?
Hi Bryn,
I just had another person ask the same question. I envision tying the ribbon around the chair. You may have to adjust your elements to make this work. I suggested possibly lighter-weight items if the pine cones are too heavy. You might succeed using a wider ban of ribbon, almost like a sash, and that could be stunning. Also, consider lightweight ornaments instead of pine cones possibly. Good luck! Blessings from Julie & Jodie
These pinecone chair decorations are absolutely fabulous. The velvet ribbon makes it look so high end, great job!!!
Tara, You are such a sweetheart! Thank you for visiting our blog and taking the time to leave a kind reply. We loved this project and are happy with the end result. Thank you again! With gratitude, Julie & Jodie
Love these pinecones! Such a great tutorial. Happy Thanksgiving!
Michelle, We are so happy you enjoyed this craft project. We had a ball putting it together. Sometimes the easiest projects are the best! Thank you for taking the time to leave a sweet reply. We wish you the Happiest of Holiday Seasons ahead. Blessings, Julie & Jodie
[…] Sara @ Twelve On Main | Jodie & Julie @ The Design Twins […]
[…] Sara @ Twelve On Main | Jodie & Julie @ The Design Twins […]
[…] Sara @ Twelve On Main | Jodie & Julie @ The Design Twins […]
[…] Sara @ Twelve On Main | Jodie & Julie @ The Design Twins […]
[…] Sara @ Twelve On Main | Jodie & Julie @ The Design Twins […]
Love your chair DIY and can see how it can be easily snapped out with other themed decor. Thank you for sharing. Happy Holidays to you and your families.
God bless
Terra
@A_bit_of_rustic_and_vintage